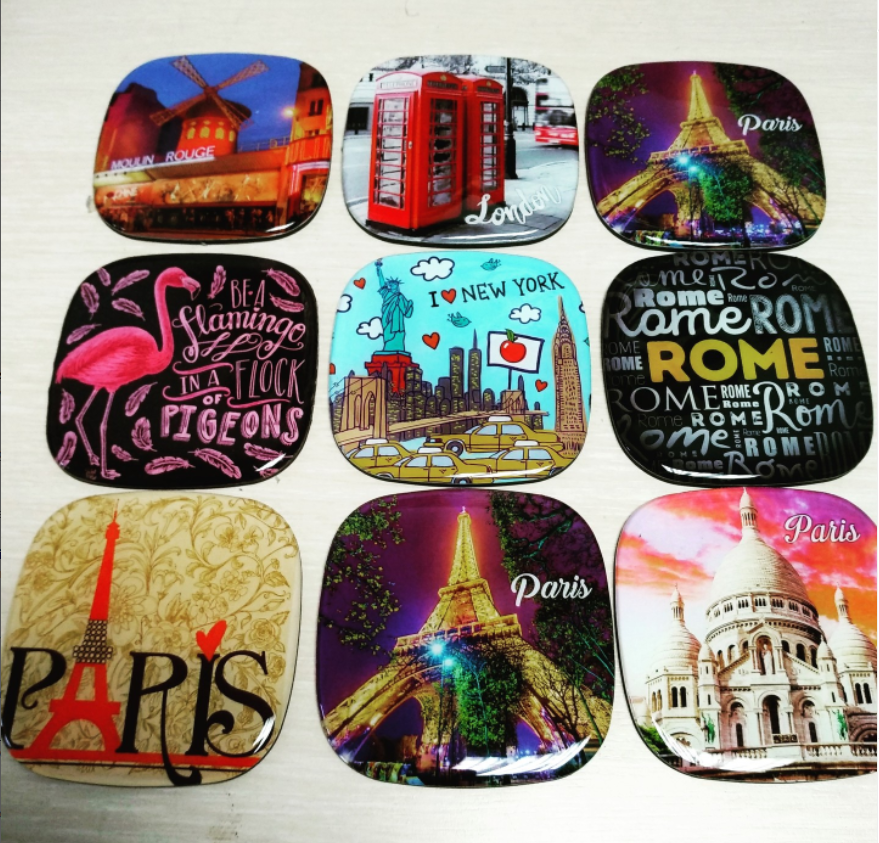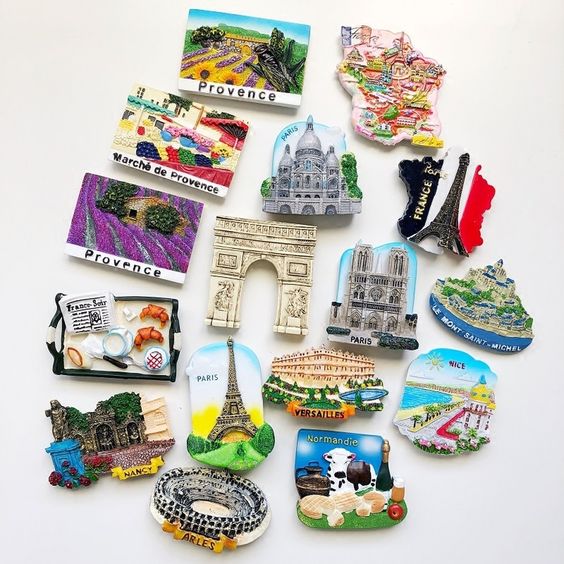
If you are sourcing custom resin fridge magnets for a museum store, a national park, an airport gift shop, or a city tourism retail chain, the single decision that quietly controls your margin, your lead time, and how long the magnet survives on a customer’s fridge is not the shape or the color. It is the manufacturing process.
Most buyers shop on price per piece and forget that the process underneath decides whether the artwork stays sharp after a summer of direct sunlight, whether 10,000 units look identical, and whether the magnet actually holds. This guide compares the four processes you will meet when you request a custom resin magnet quote — UV printing, screen printing, epoxy dome, and hand-painting — using the real production specs from a working resin souvenir factory. No vague supplier promises. Just the numbers that affect your shelf.
Get the process wrong and the damage is quiet but expensive: a faded print becomes a return, a weak magnet becomes a complaint, and a late container becomes an empty shelf in your best sales month. The guide below is built so you can get it right the first time.
Why the Manufacturing Process Decides Your Margin
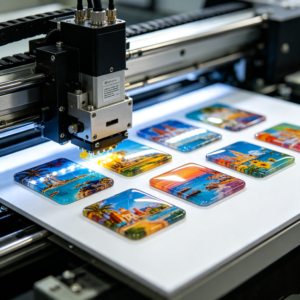
A souvenir magnet is a repeat-purchase, low-ticket item. Your profit lives in three places: the unit cost, the defect rate, and the reorder cycle. All three trace back to process.
- Unit cost swings on whether the method is automated (UV, screen) or labor-intensive (hand-painting, epoxy dome).
- Defect rate swings on how many human touches a piece passes through. A digitally printed magnet is near-identical every time; a hand-painted one carries artisan variance you must plan for.
- Reorder cycle swings on lead time. A process with a 7–21 day sampling window and a locked 45–60 day bulk window lets you plan a season. A process with loose timing leaves your shelves bare in August.
If you only remember one thing from this guide: match the process to the artwork and the volume, not to the cheapest quote. The cheapest process for a photo-real landmark is the wrong process for a mascot, and vice versa.
UV Printing — The Workhorse for Photo-Real Souvenirs
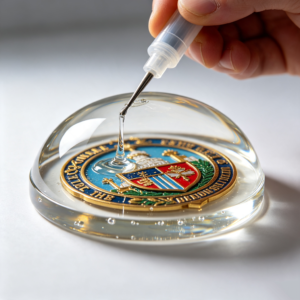
UV printing is the method most modern resin souvenir factories lead with, and for good reason. Ultraviolet-cured ink is dried instantly by UV light as it hits the resin surface, which bonds the pigment permanently instead of letting it sit on top and wear off.
How UV Printing Works on Resin Magnets
A flatbed UV printer lays down ink in precise passes, then a UV lamp cures each pass immediately. Because the ink is digital, there is no plate to make and no minimum color count to pay for. Modern machines can also stack white ink to build a 3D embossed texture — you can feel the contour of a landmark or a petal, which is exactly the “touchable premium” museum buyers respond to.
What UV Printing Is Best For
- Photographic landmarks and city skylines with fine gradients.
- Small text, maps, and barcode-ready artwork.
- High-volume runs where every unit must look identical.
- Designs that need to resist fading under retail lighting.
The Real Numbers Behind UV Resin Magnets
At a typical factory-direct resin magnet workshop, UV pricing lands around $0.23–0.25 per piece at a 1,200-piece minimum, with a one-time mold charge of about $45. Sampling runs 7–21 days and bulk production is locked at 45–60 days from sample approval. Every magnet is pull-force tested to a minimum of 450g, and the print is verified under a 48-hour yellowing test at 6500K retail lighting before it ships.
For a buyer, that combination — low per-piece cost, consistent output, and a predictable window — is why UV printing is the default for tourism retail programs that launch small and reorder often.
Screen Printing — The Low-Cost King for Simple Logos
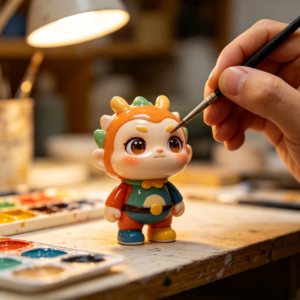
Screen printing (silkscreen) is the older, simpler method, and it is still the right call for a specific kind of artwork: solid color blocks, single- or two-color logos, and text where photo realism is irrelevant.
When Screen Print Wins
- Your design is one or two spot colors with no gradient.
- You are producing a huge volume of a simple branded magnet.
- Per-piece cost matters more than fine detail.
Where Screen Printing Falls Short
Screen printing cannot reproduce gradients or photo-level detail, and every additional color means a separate screen and a separate setup cost. If your landmark design is a sunset gradient, screen print will flatten it into bands of color. For most modern souvenir programs — where travelers expect the photo on the fridge to match the photo on the phone — UV has overtaken screen print for anything with detail.
One more caution from the factory floor: the cheapest quotes you see online are often low-resolution heat transfers or weak UV passes, not true screen or flatbed work. Always request a physical sample before committing a bulk order.
Epoxy Dome (Resin Doming) — The Premium 3D Gloss
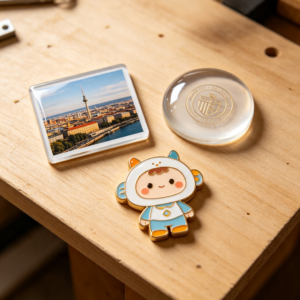
Epoxy dome is not a printing method by itself. It is a protective top layer poured over printed or painted artwork: a clear, self-leveling resin that forms a raised, glass-like bubble. You see it on high-end badge magnets and premium souvenir pieces.
What Epoxy Dome Is Best For
- Premium gift-shop pieces where the “wet look” signals quality.
- Protecting the print underneath from scratches and moisture.
- Small, detailed emblems where a 3D lens adds perceived value.
The trade-off is cost and fragility at scale. A domed magnet costs more per piece and the dome can yellow or de-laminate if the resin is low grade. Spec a UV-stable dome and verify it under the same 48-hour yellowing test you would use for the print itself.
Baking Paint / Enamel — For Metal Badge-Grade Magnets
Baking paint (sometimes called enamel or kiln-fired paint) is common on metal-base magnets rather than pure resin. The color is filled into a recessed metal shape and baked to cure. The result is extremely durable and feels high-end, but tooling is expensive and color count is limited.
For a resin souvenir program, baking paint is usually overkill unless you are blending metal badges into a magnet line for a heritage or museum brand. If your artwork is a detailed photo, skip it. If your artwork is a clean two-color crest, it is worth a quote.
Hand-Painting — Artisan Detail for Mascots and Bespoke Pieces
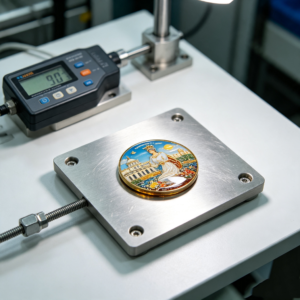
Hand-painting is the oldest method and, for the right design, still the most valuable. A skilled artisan applies color in layers, then seals it with a UV-protective coat. The result carries a human texture that digital methods cannot fully copy.
The Numbers Behind Hand-Painted Resin Magnets
Hand-painted pricing runs about $0.28–0.35 per piece at a 1,200-piece minimum, with a one-time mold charge near $100. Lead times match the UV line — sampling 7–21 days, bulk 45–60 days — but per-piece labor is higher and slight color variance between units is normal and expected.
What Hand-Painting Is Best For
- Character mascots and artisan souvenirs where “one of a kind” sells.
- Small-batch, high-perceived-value lines for boutique museum stores.
- Designs with soft edges and personality that digital print flattens.
Hand-painting is not the enemy of scale. It is the deliberate choice for the part of your assortment where margin comes from craft, not volume.
Resin Fridge Magnet Process Comparison Table
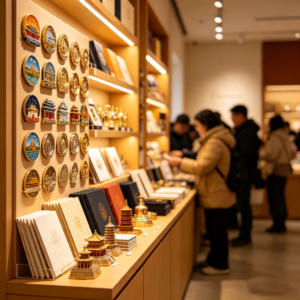
The table below puts the four processes side by side using the factory specs a buyer actually negotiates on. Use it as your shortlist before you request a quote.
| Process | Best for | Durability | Indicative cost at 1,200 pcs | Sampling / bulk lead time | MOQ per design |
|---|---|---|---|---|---|
| UV printing | Photo-real landmarks, gradients, fine text, high volume | Fade-proof, scratch-resistant (48h yellowing test at 6500K) | ~$0.23–0.25/pc + $45 mold | 7–21 days / 45–60 days | 1,200 pcs |
| Screen printing | Solid color blocks, 1–2 color logos, text | Good, but no gradient; wears if coating is thin | Lower for simple art; rises with each color | 7–21 days / 45–60 days | 1,200 pcs |
| Epoxy dome | Premium 3D gloss, badge-style emblems | High with UV-stable dome; risky with cheap resin | Higher (doming is added layer) | 7–21 days / 45–60 days | 1,200 pcs |
| Baking paint / enamel | Metal-base crests, heritage brands | Very durable, badge-grade | Higher; per-color plate charge | Longer (baking + tooling) | Varies by factory |
| Hand-painting | Mascots, artisan, bespoke souvenirs | High (3-layer paint + UV coat) | ~$0.28–0.35/pc + $100 mold | 7–21 days / 45–60 days | 1,200 pcs |
Notice that lead time barely moves between processes. The differentiator is cost structure and the kind of artwork each method protects. That is the point: pick the process for the design, then negotiate the volume tier.
How to Choose the Right Process for Your Souvenir Program
Match the method to the job with this simple decision path:
- Is your artwork a photo, a gradient, or fine text? → UV printing. It is the only method here that reproduces detail at volume without per-color plate fees.
- Is your artwork one or two flat colors with no detail? → Screen printing, if the volume is high enough to beat UV on price.
- Is this a premium, gift-box-tier piece? → Epoxy dome over a UV or printed base for the “wet glass” finish.
- Is your artwork a mascot or a heritage crest? → Hand-painting for mascots, baking paint for metal crests.
- Do you want to mix? → Most factories run all processes under one roof. You can launch a UV landmark line and a hand-painted mascot line in the same 1,200-piece-per-design order.
If you are building a destination retail assortment, the strongest combos are usually UV for the “I was here” skyline and hand-painted for the character that becomes the repeat gift. One sells the place; the other sells the smile.
Quality Checks That Protect Your Shelf Life
Process choice is half the battle. The other half is the factory’s quality system, because a perfect process still fails if the line is loose. The specs below are what a serious resin magnet buyer should ask for by name — and what a real factory-direct workshop should be able to state without hesitation.
| Quality check | What it protects | Buyer-ready spec |
|---|---|---|
| Pull-force test | Magnet stays on the fridge, not the floor | Minimum 450g on every single piece |
| Yellowing test | Color does not fade under shop light | 48 hours at 6500K retail lighting |
| Final inspection | Batch consistency | AQL 2.5 random inspection |
| Defect tracking | Long-term reliability | Defect rate held under 1.2% across a full year |
These are not marketing lines. They are the difference between a magnet that comes back as a return and a magnet that comes back as a reorder. When you request a quote, ask the supplier to confirm each one in writing.
Lead Time & Reorder Planning
Tourism retail is seasonal, and the factories that understand it give you a fixed window instead of a vague “it depends.” For a custom resin magnet program, plan on:
- Sampling: 7–21 days from approved artwork to a physical proof you can hold.
- Bulk production: 45–60 days from sample approval to container loading.
- Capacity: a single workshop running both UV and hand-painted lines can sustain roughly 100,000 pieces per month, which covers most regional museum and park programs with room to reorder.
A simple reorder calendar makes this concrete: approve artwork in late January, receive the sample by mid-February, and your bulk order lands by early April — comfortably ahead of a Memorial Day weekend push. Push approval to March and you miss the window. The process does not change; your planning does.
The practical move: approve your hero designs in the quiet quarter, lock the 45–60 day window, and have stock landed before the first bus of the season. Buyers who treat the lead time as fixed — not as a hope — are the ones with full shelves in July.
For a deeper walk-through on ordering in volume, see our complete guide to bulk ordering resin fridge magnets, and for vetting a production partner, our supplier selection guide.
Common Mistakes Buyers Make When Choosing a Magnet Process
After reviewing hundreds of custom souvenir programs, the same avoidable errors show up again and again. Catching them early is cheaper than a redo.
- Chasing the lowest per-piece quote. A $0.18 magnet that fades in a month costs more in returns and lost reputation than a $0.25 magnet that lasts. Price the total cost of ownership, not the sticker.
- Forcing one process across the whole line. A skyline deserves UV; a mascot deserves hand-painting. Running everything through the cheapest method flattens your best-selling design.
- Ignoring pull force until launch. Specifying a 450g minimum pull is a one-line request that prevents a shelf full of floor-drop returns. Buyers who skip it learn the hard way.
- Treating lead time as flexible. The 45–60 day bulk window is fixed by production reality, not negotiation. Buyers who order in May for a July peak are the ones with empty pegs.
- Skipping the physical sample. A design on a screen lies. The 7–21 day sampling step exists so you can hold the real piece, check the dome, and feel the emboss before you commit a container.
None of these are exotic failures. They are the ordinary reasons a promising souvenir line underperforms — and every one of them is decided at the process-selection stage, long before production starts.
Frequently Asked Questions
Which resin magnet process is cheapest?
For simple one- or two-color artwork, screen printing is usually cheapest. For detailed or photo-real artwork, UV printing is cheaper than hand-painting once you pass a few thousand pieces, because UV is automated while hand-painting is labor per unit.
Can I mix processes in one order?
Yes. A factory that runs multiple lines can produce a UV skyline magnet and a hand-painted mascot in the same program. The minimum order quantity applies per design, typically 1,200 pieces, not per process.
Are UV inks safe for home and retail use?
Reputable UV inks are low-VOC and formulated to meet international safety standards such as RoHS and REACH. Ask your supplier for the compliance statement; do not assume.
How long does production actually take?
Sampling is 7–21 days and bulk production is 45–60 days from sample approval. Build your reorder calendar backward from your peak selling season, not forward from the order date.
What magnet strength should I specify?
Spec a minimum pull force of 450g per piece. Anything lower risks the magnet sliding off a steel fridge door, which is the fastest way to turn a souvenir into a return.
Work With a Factory That Runs All Four Processes
The right partner is not the one that only knows UV, or only knows hand-painting. It is the one that tells you — honestly — which process fits your artwork, then proves it with specs instead of adjectives. Look for factory-direct pricing with no trading-company markup, a 1,200-piece minimum that lets you launch small, sampling in 7–21 days, bulk in 45–60 days, and a quality line that states pull force, yellowing resistance, and inspection level by name.
If you are planning a museum, park, airport, or city tourism magnet line and want a quote that lists the process, the mold charge, the per-piece cost, and the lead time in plain numbers, send us your artwork. We quote within 24 hours, and we will tell you — straight — whether UV, screen, dome, or hand-painting is the right call for each design.

- Resin Fridge Magnet Manufacturing Processes Compared: UV Printing, Screen Printing, Epoxy Dome & Hand-Painting (2026 Buyer’s Guide) - August 11, 2026
- How to Choose a Reliable Resin Souvenir Factory in China: A Comprehensive Audit Guide for B2B Buyers - August 5, 2026
- The Ultimate Guide to Sourcing Custom Resin Souvenirs: From Factory Design to Global Wholesale (2026 Edition) - July 29, 2026